Thirty years ago, when I first started taking yoga classes, Virasana (Hero’s Pose) was a 50/50 proposition. Some days it was fine. Sitting up on three foam blocks, I could feel a pleasant stretch in the fronts of my feet. My knees didn’t bother me, my front thighs weren’t tight, and life was good. 
On other days, without warning, one of my arches would cramp. (I know of two cures for foot cramps. One is to stand up and put weight on the afflicted foot. The other is to sit with the cramp until it goes away. In my experience, the second approach, once you can bear it, gives more long-lasting results.)
After several years of practice, my feet stopped cramping. I took out one block, and there I stayed. Ardha Padmasana (Half Lotus Pose) became Padmasana (Full Lotus Pose). Baddha Konasana (Bound Angle Pose) opened, and my shins dropped to the floor. My hamstrings lengthened, and I no longer needed to sit on a blanket in forward bends.
And yet I still sat on two blocks in Virasana. The roll between my calves and thighs is close to a magical prop for foot pain, and it helps tight calves and thighs too.
At that stage of my practice, I didn’t mind. Hero’s Pose is one of the first seated poses taught to beginners. Small children do it quite naturally, even if they do sit with their feet out to the side, like this dubiously dressed model, at an angle that’s hard on the knees. (see photo right) 
I was working on more glamorous poses, such as Pinca Mayurasana (Peacock Pose) and Salamba Sirsasana (Headstand Pose), and wasn’t interested in something so seemingly basic. Besides, when I took out a block and tried to sit lower, I was instantly transported into the land of misshapen ankles that bowed outward, rapidly turned white, and were exceedingly uncomfortable.
Foot Problems to the Rescue
It might have stayed that way if I hadn’t started having foot problems: a sprained left toe, and plantar fasciitis, both on the same foot. In a disturbing and related development, my left leg had suddenly begun to tighten. Leg stretches felt wildly different on the left and the right sides.
Sitting in Virasana with a thick roll between my calves and thighs gave me relief, especially when I also stretched my feet on wood blocks. The extra pressure on my calves and hamstrings works like a deep massage and has softened my left leg again. For the tight hamstrings, using a roll in Virasana is a useful way to loosen up.
I still begin most practices in Hero’s Pose with a roll, and use the position to center and quiet myself. The unexpected bonus: slowly, Hero’s Pose is beginning to change. I understand it better than when I was perched up on blocks. I can see how my groins need to move deeper while my femur heads pull toward each other.
This Five-Minute Yoga Challenge is an excellent way to increase your leg flexibility, reduce pain in your feet, calves, and heels, and remove some causes of knee pain.
If you have an existing knee injury, avoid this pose until your yoga teacher, or your physiotherapist has cleared you to work with it.
Here’s How to Set it Up: 
-
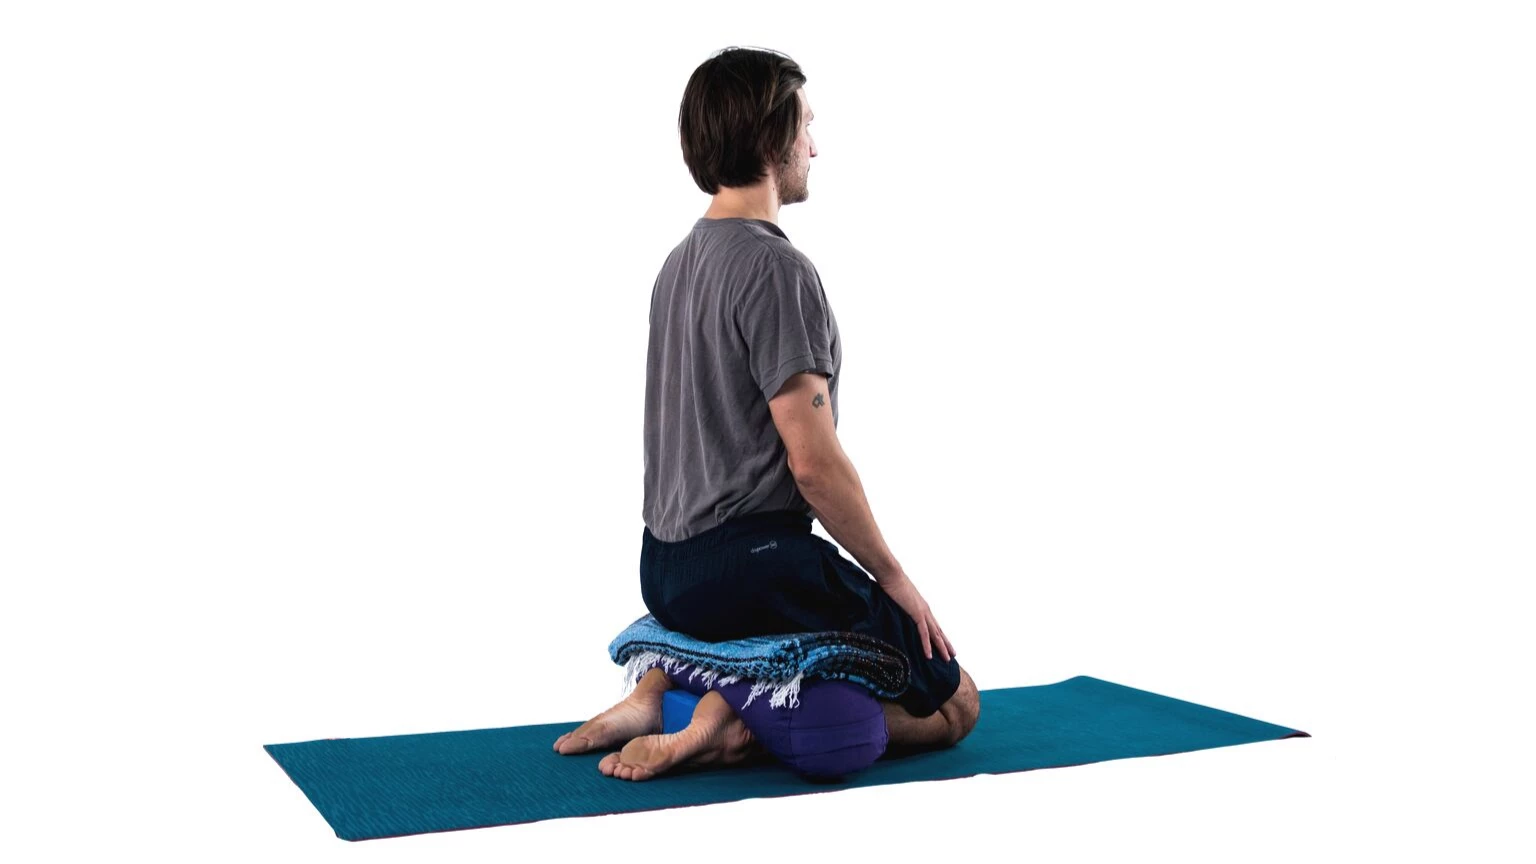
Fold a blanket so that it’s a rectangle of about 2 feet by 3 feet. Place the wide side at the end of a yoga mat. Roll up the mat and the blanket to make a thick, not-too-firm roll. Once you move into Virasana, you can adjust the thickness of the roll to fit your body’s needs.
-
Have a collection of yoga blocks or blankets close at hand. Set your timer for five minutes. You can stay longer if you like. If your knees hurt at any point in the process, come out of the pose, even if it’s been much less than five minutes.
-
Come to a kneeling position on another yoga mat with your knees no wider than hip-width apart, with the thighs parallel.
-
To bring the roll as deeply as possible behind your knees, lean forward and place your forehead on the floor. Place the roll on top of your calves and in the crease behind your knees. As you begin to sit back, take your hands to your hamstrings and draw them up toward your buttocks. Then slowly bring your weight onto the roll.
-
Your buttocks will be suspended in the air. If you’re in some discomfort, but basically okay—you can breathe easily through your nose, and your eyes aren’t popping out of your head—then let your buttocks hang for a moment to see if you descend further. When you’ve reached your limit, place whatever props you need for a comfortable seated position underneath your buttocks. The height of support determines the intensity of the sensation.
-
You can try a placing yoga block under your buttocks on different levels. Or you can use a pair of them in different combinations, or a yoga block and a blanket.
-
Make the pose challenging, but doable. You will feel compression in your calves and the backs of your thighs. Stay with it. You should not feel pain either in the fronts or backs of your knees. If you do, leave the pose and place more support under your hips.
-
Sit tall. Press your fingertips into the roll, and use your arms to help lift your spine.
-
To come out, lean forward and remove the roll. Then remove the other props and carefully test your Virasana. You may find that you can sit a little lower than your usual setup. Don’t push it. If you feel pain in your knees, or your ankles bow out and turn white, you need to sit higher.
-
Before you leave your mat, stretch out the backs of your knees in Dandasana (Seated Staff Pose), Adho Mukha Svanasana (Downward Facing Dog Pose), or Uttanasana (Standing Forward Bend Pose).
More yoga basics and helpful practice tips from Eve Johnson – Yoga Strap Magic: Use a Long Strap to Put Your Shoulders in Place.
Study with YogaUOnline and renowned yoga teacher and writer, Judith Hanson Lasater – Taking Refuge: Coming Home to Ourselves.

Reprinted with permission from My Five-Minute Yoga Practice.

Eve Johnson taught Iyengar Yoga for 18 years before being introduced to Spinefulness in 2016. Convinced by the logic, clarity, and effectiveness of Spineful alignment, she took the teacher training course and certified in July 2018. Eve teaches both Spinefulness and Spineful Yoga at Prodigy Movement, in Vancouver. For class information, go to http://spinefulness.ca.

