How do you walk your Downward Facing Dog Pose (Adho Mukha Svanasana)? I’m tempted to say, “let me count the ways,” but there are so many. Let’s just look at one breed of dog, the group that uses height to get a specific effect.
 (Yes, you get marks on your hands, but the work in your arms is worth it. See photo to the right.)
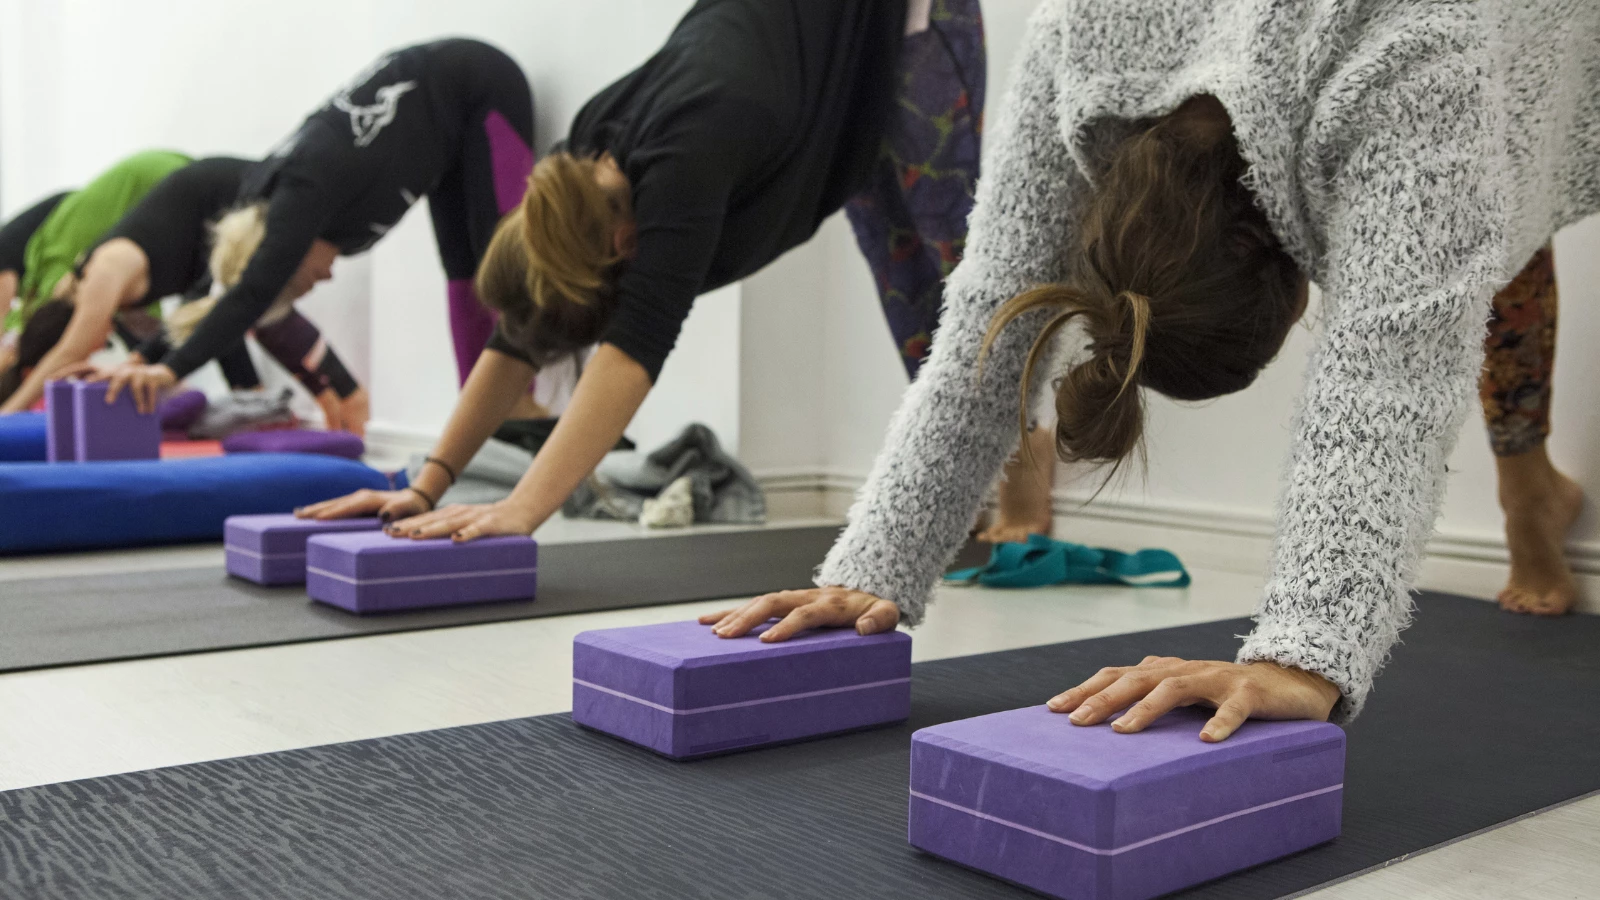
If you’ve spent much time in Iyengar yoga classes, you already know that raising your feet on blocks or a stool eases your hips in Downward Facing Dog Pose, but makes your shoulders work harder. Putting height under your hands, on blocks, or on a chair seat, eases your shoulders and helps you put more weight into your legs.

(Put your hands on the blocks as close to your wrists as possible. See the image to the left.)
But lift your fingers, and you’ll feel the effects all the way up your inner arm, in the same way that lifting your toes in Mountain Pose (Tadasana) brings your legs alive all the way to the tops of your thighs.
(In the preparation, focus on pressing your inner hands down and pulling your inner upper arms up, all the way to your collar bones. See the photo top-view below.)
Our inner arms tend to be shorter than our outer arms. When you lift your fingers, you can increase the work of your inner arm, lifting and lengthening your biceps. That’s especially useful for all of us who have overly flexible joints, “leaky elbows” that move too far toward each other when we straighten our arms.
I don’t find this block variation to be at all painful, at least in a moderately long holding, although the word “uncomfortable” certainly springs to mind. And you do end up with impressive lines on the heel of your hand.
Lift Your Fingers, Strengthen Your Arms in Downward Facing Dog Pose
 Place two yoga blocks on their lowest side at the wall. (We took the picture with the blocks away from the wall because it’s easier to see the work in my arms.)
- Place your hands, as close to your wrists as possible, at the front edge of the bricks. Come onto your hands and knees, lift your fingers as much as possible away from the brick, and begin to work your arms. From your thumb mounds, lift up your inner arms toward your collarbones. Broaden across your collarbones, then firm your outer shoulders in toward the shoulder joints without losing the width of your collarbones.
- Keep the actions in your inner arms as you slowly move into the pose.
- Keep those actions as you lift your pelvis. Move slowly, keeping your awareness of the actions of your inner arms as you move more deeply into Downward Facing Dog Pose.
- If you do find the block painful on your hands, there are a few workarounds. You might, for example, pad the edges of the bricks with a sticky mat. Mini-stickies made from cut-up old mats work well.

If using blocks doesn’t work for you, try using a chair instead. The chair back goes upside down against the wall, with the bottom side of the chair seat facing out. You’ll get the same effect of lifted fingers, without the sharp-edged pressure on your wrist.
Using the chair gives you much of the same effect as lifting your fingers, but without the fancy marks on your palms.
(chair image below)
How to Refine Your Pose

No matter how you set up the pose, spend plenty of time working your arms with your knees still on the floor. It’s more important to feel the lift of your inner arms all the way to your collar bones than it is to “complete” the pose.
Besides, in the preparation, you can focus on one arm at a time. I find it hard to get the action in both arms at once. It helps to look at one arm and focus on lifting that inner arm, then hold the action as I transfer my gaze to the second inner arm. It’s rewarding to see the muscle elongate and lift.