
Practicing supported yoga at the wall is a welcome change when you are living a fast-paced lifestyle. Supported Asana embraces slowing down and can be quite accessible. This relaxing sequence uses a wall, often an underutilized prop. You are welcome to use any other yoga props to enhance these variations. The beauty of this sequence is that if you only have a few minutes to yourself without access to any props other than a wall, you can still relax and restore.
1. Yoga Practice at the Wall: Downward Facing Dog

This version of Adho Mukha Svanasana (Downward-Facing Dog Pose) stretches the backs of the legs, the sides of your body, spine, chest, and shoulders. This variation is great preparation for the whole body before lying still in the poses that follow.
- Stand in front of a wall with your fingertips touching the wall at the height of your hips.
- Walk away from the wall and place your full palms on the wall. Check your lumbar spine to make sure that it is not rounded. You can do this by placing a couple of fingers on the spine. If the spinous process (the knobs in the posterior spine) are sticking out, walk your hands up the wall and check again. Keep raising your arms until you find a height that allows your lumbar spine to dip into the back rather than poking out.
- Often, the feet will end up behind the hips. If you feel as if your body is leaning into the wall, step slightly closer to the wall, as this will help enhance the axial extension of your spine.
- Press through your feet and hands as you stretch your hips toward the middle of the room.
- Try wagging the hips gently from side to side to augment the sensation along the side body and shoulders.
- Stay here for as few as five breaths. Walk your feet toward the wall to return to a standing position.
2. “Grounded” Supta Padangusthasana (Reclined Hand-to-Big-Toe Pose) Practiced at the Wall

Reclined Hand-to-Big-Toe Pose is soothing for the nervous system and can help release tension in the backs of the legs. As this is a more restorative yoga practice, only straighten the leg to the degree that feels effortless. If the stretch causes you to hold your breath, do less. The added component of pressing the heel into the wall adds a sense of grounding and helps keep the body in a neutral position.
- Lie on your back with your legs stretched out along the floor and the soles of your feet pressing into the wall.
- Press your left heel into the wall and ground the top of your left thigh toward the floor.
- Bend your right knee into your chest and loop a strap around your right heel. If you don’t have a strap, clasp your hands behind your right thigh.
- Press your heel against the loop of the strap as you straighten your leg. If you are not using a strap and your hands don’t reach the back of your thigh without your shoulders lifting off the floor, then extend the leg upward on its own without using your hands. Adjust the angle so that your knee can be straight.
- If you are using a strap, let the elbows come down to the floor to reduce any tension in the chest and shoulders.
- Try moving your right leg to the right and left any amount. Keep the left foot grounded against the wall and the left hip on the floor. Notice how the sensations in the back of the leg change with the movement.
- Stay here for up to 3 minutes. Release your right leg to the floor for a few breaths, and then move to the other side.
3. Supta Talasana (Reclining Palm Tree Pose): Yoga Practice Using the Wall
Side bends can help release tension in the intercostal muscles, allowing the ribs to expand more freely. This helps to ease the breathing process.
- After finishing the Reclined Hand-to-Big-Toe Pose, stretch your legs along the floor, press your heels into the wall, and lift your arms overhead.
- Firmly press your right foot into the wall as you lean your torso and arms to the left.
- Stay here for a few breaths.
- When you are ready, lift your arms back up to the center, then place them by your sides to rest in Savasana (Relaxation Pose). Compare the right and left sides of your body. Is breathing easier on one side than on the other?
- Then, lift the arms again and repeat to the right. When you come back to the center, release your arms and observe your two sides again.
4. Supta Ardha Padmasana (Reclined Half Lotus Pose) Against The Wall
Reclining Half Lotus Pose stretches the outer hips and the piriformis. The wall helps to increase awareness of your body’s positioning and provides additional points of support.
- Lie on the floor with your knees bent and toes touching the wall.
- Lift both soles of the feet onto the wall and create a 90-degree angle at the knees and hip joints. You may need to move closer or further away from the wall to achieve this angle.
- Keep your sacrum on the floor and maintain the natural curvature in your lower back.
- Cross your right ankle across the top of your left thigh. Flex your ankle.
- Stay here or lift the foot away from the wall. Remain here for a few breaths.
- Place your left foot back onto the wall, take your arms out sideways, and lean to the left for a mild twist. Your right hip may come away from the floor, but continue to direct it toward the floor.
- Take a few breaths in this position, then return to the initial position with both feet on the wall.
- Repeat on the other side.
5. Viparita Karani (Legs-Up-the-Wall Pose)
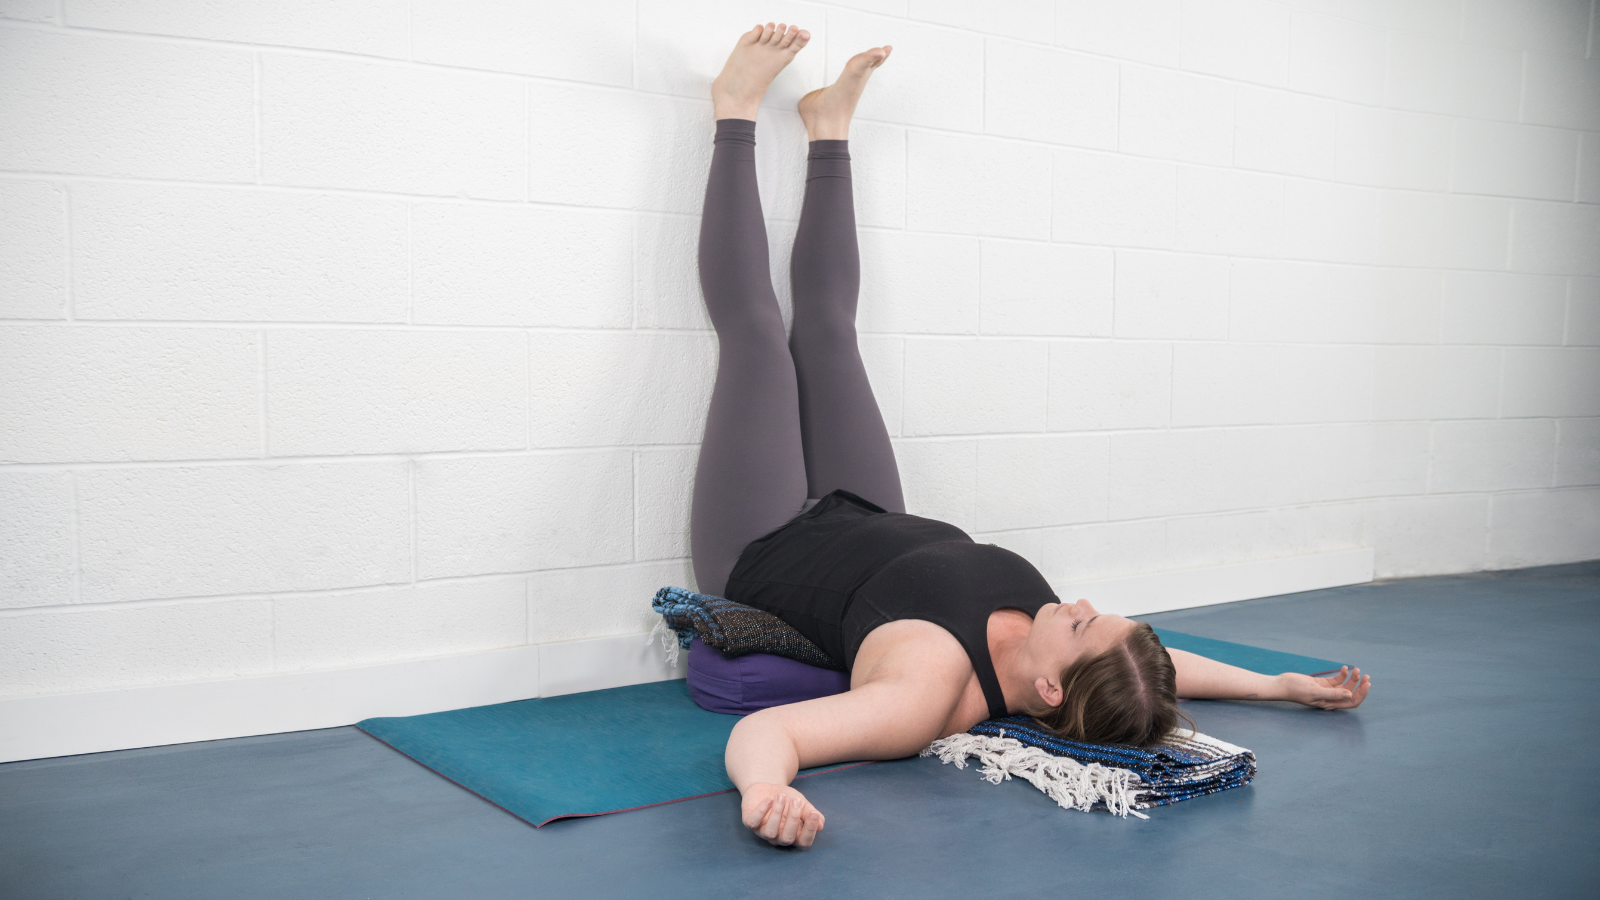
Legs-Up-the-Wall Pose can be a soothing pose to help you decompress from your day. The wall is there to support the backs of your legs as your thigh bones nestle into your hip sockets. This pose can also relieve swelling in your lower legs and feet.
- Sit with your right shoulder and side of your body against the wall.
- Start to recline, easing your body to the floor. Rotate your body so that your hips are against the wall and your legs extend up the wall. Make sure to align your torso and head with your hips.
- Rest your arms anywhere that feels comfortable.
- Stay here for up to 20 minutes.
This yoga at the wall sequence can be quite short or about 45 minutes long. You can tailor it to your needs. So long as you have a wall, you can find a little refuge throughout your day with these five restorative poses praacticed at the wall.

Allison Schleck, E-RYT 500, RPYT, is a vinyasa-based yoga teacher fascinated by the intricate relationship between the mind and body. She offers a range of alignment-focused classes touching on anatomy, philosophy, and creative propping with a mindful approach. In addition to teaching group classes and managing the Yoga Culture studio in Danbury, CT, she also teaches at Open Door Family Medical Center in Westchester, NY, empowering mothers-to-be with prenatal yoga classes and childbirth education. You can find her @allisonschleck on Instagram and www.allisonrayjeraci.com.
