Life is hard. Each day work, family, finances, and so much more can take a toll on both our physical and mental well-being. That's where rejuvenating and restorative yoga poses come in.
Yet during these most trying times, we need to get still and be quiet. A quiet mind can solve problems. And a still body can rest and heal.
Restorative Yoga: Benefits of a Slower, Quieter Yoga Practice
A restful, restorative practice can have many overall benefits, including:
- Reduces stress
- Promotes well-being
- Improves sleep patterns
- Increases creative thought
- Decreases risk of injury
A restorative practice doesn’t necessarily have to be meditative, but you’ll most likely find that once you allow your body to rest, your mind will quiet as well, making meditation more easily accessible.
Meditation is beneficial for both short-term and long-term health. Meditation has the immediate benefits of reducing stress, reducing negative emotions, increasing self-awareness, and focusing on the present.
A growing body of scientific studies supports the long-term health benefits of meditation for managing the symptoms of diseases such as anxiety, chronic pain, chronic depression, irritable bowel syndrome, and heart disease.
Props Will Help Ease You into a Restorative Yoga Practice
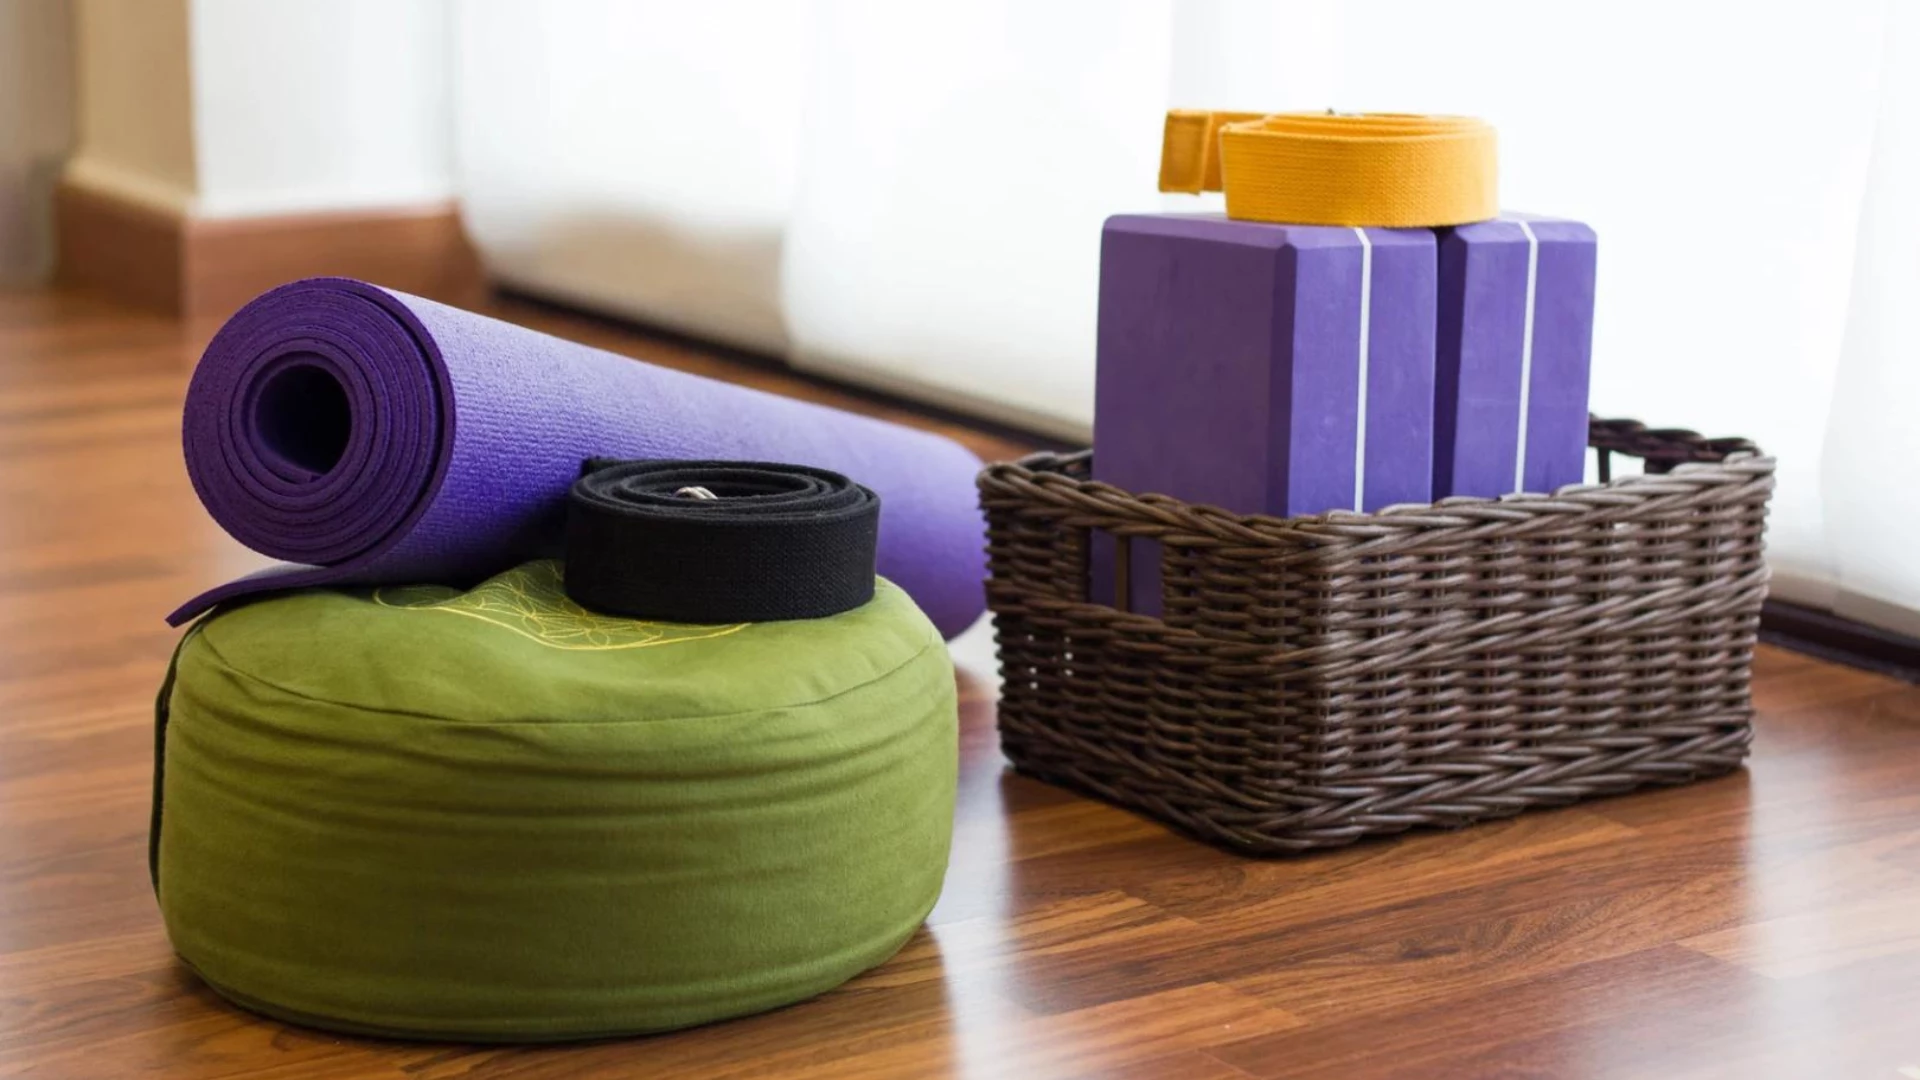
When planning a restorative yoga practice, props are essential for full relaxation. Props can include:
- Blankets: Although a mix of wool and polyester blankets is traditionally used in yoga, any blanket can be folded to different thicknesses.
- Blocks: A variety of different-sized blocks may be handy for stability and height.
- Bolster: Bolsters do what they imply; they bolster a specific part of the body to allow for release or support.
- Belt: I prefer a longer 10-foot belt to stabilize joints and encourage flexibility.
- Sandbag: In my own restorative practice, a sandbag is a must. Since sandbags provide weight, you should use caution when placing a sandbag directly onto a joint. However, their benefit in releasing overworked muscles makes them invaluable.
Props allow for a greater sense of ease and stability while practicing. In any pose, give yourself permission to play with the props to find a greater sense of comfort with the props. Whether that means using a block to raise the height of the floor or using a bolster to ease overworked muscles and counteract the effects of muscular imbalances, using props will enhance your restorative practice.
A Restorative Yoga Practice to Rejuvenate Your Mind and Body
1. Sukhasana (Easy Pose or Easy Seated Pose)

Although the English name for Sukhasana is “Easy Seated Pose,” this pose can be anything but easy for those with knee, hip or lower back issues. Elevating the seat so your hips are above your ankles can help alleviate discomfort.
- Sit upright near the front edge of a meditation cushion, bolster, or folded blankets. If your shoulders or upper body still hold tension, place an additional folded blanket in your lap and rest your forearms on your lap blanket.
- Bring your fingers into Jnana Mudra by touching the thumb and first finger together on each hand and resting the backs of your hands onto your knees or your folded lap blanket.
- Begin your restorative practice by simply bringing awareness to any physical sensations you may be feeling. Don’t force your breath or judge your thoughts. Simply breathe.
- If you find yourself with a monkey mind full of random, jumbled thoughts, repeat the Buddha’s Lovingkindness meditation:
May I be safe.
May I be healthy.
May I be free.
May I live with ease.
2. Supta Baddha Konasana (Reclining Bound Angle Pose)

Regular time spent in Reclining Bound Angle Pose can relieve depression, stress, and menstrual issues and improves circulation.
- Place two folded blankets under the top edge of a bolster so that your bolster is slanted upward toward the head end of your mat. Sit at the bottom edge of the bolster and gently guide yourself to lie back against the bolster, making sure your back and head are fully supported.
- Allow your knees to fall to the side with the soles of your feet together. A block or pillow placed under the outer edge of your knees will allow your hips to relax and release even further.
- Breathe and allow your body to relax into the bolster in this soothing Restorative yoga pose.
3. Balasana (Child’s Pose)

Although Child’s Pose is a favorite restorative yoga pose for many yogis, it’s one that some find difficult to truly relax into.
- To begin, sit in a kneeling position with your hips against your heels and your legs in a “V” shape with the toes touching.
- Slide a bolster snugly between your legs.
- Lower your torso onto the bolster. Your shoulders and hips should be equidistant from the floor.
- If your hips are higher than your shoulders, use blankets or pillows to raise the height of the support.
- Turn your head to the right so that your left nostril is on top. Left nostril breathing is cooling and calming for your body.
4. Setu Bandha Sarvangasana (Bridge Pose)

Bridge Pose is both a gentle backbend and a slight inversion since the heart is above the head. Using a block will help to stabilize the lower back and sacrum. Many yogis find sciatic pain relief using a block in Bridge Pose as a more restorative yoga pose version of Bridge Pose.
- To come into Bridge Pose, lie down on your yoga mat with your knees bent and the soles of your feet on the floor.
- Lift your hips and place a block with the flat, wide side under the tailbone and sacrum.
- Changing the height of the block will increase the backbend, the inversion, and the opening in the front of the body.
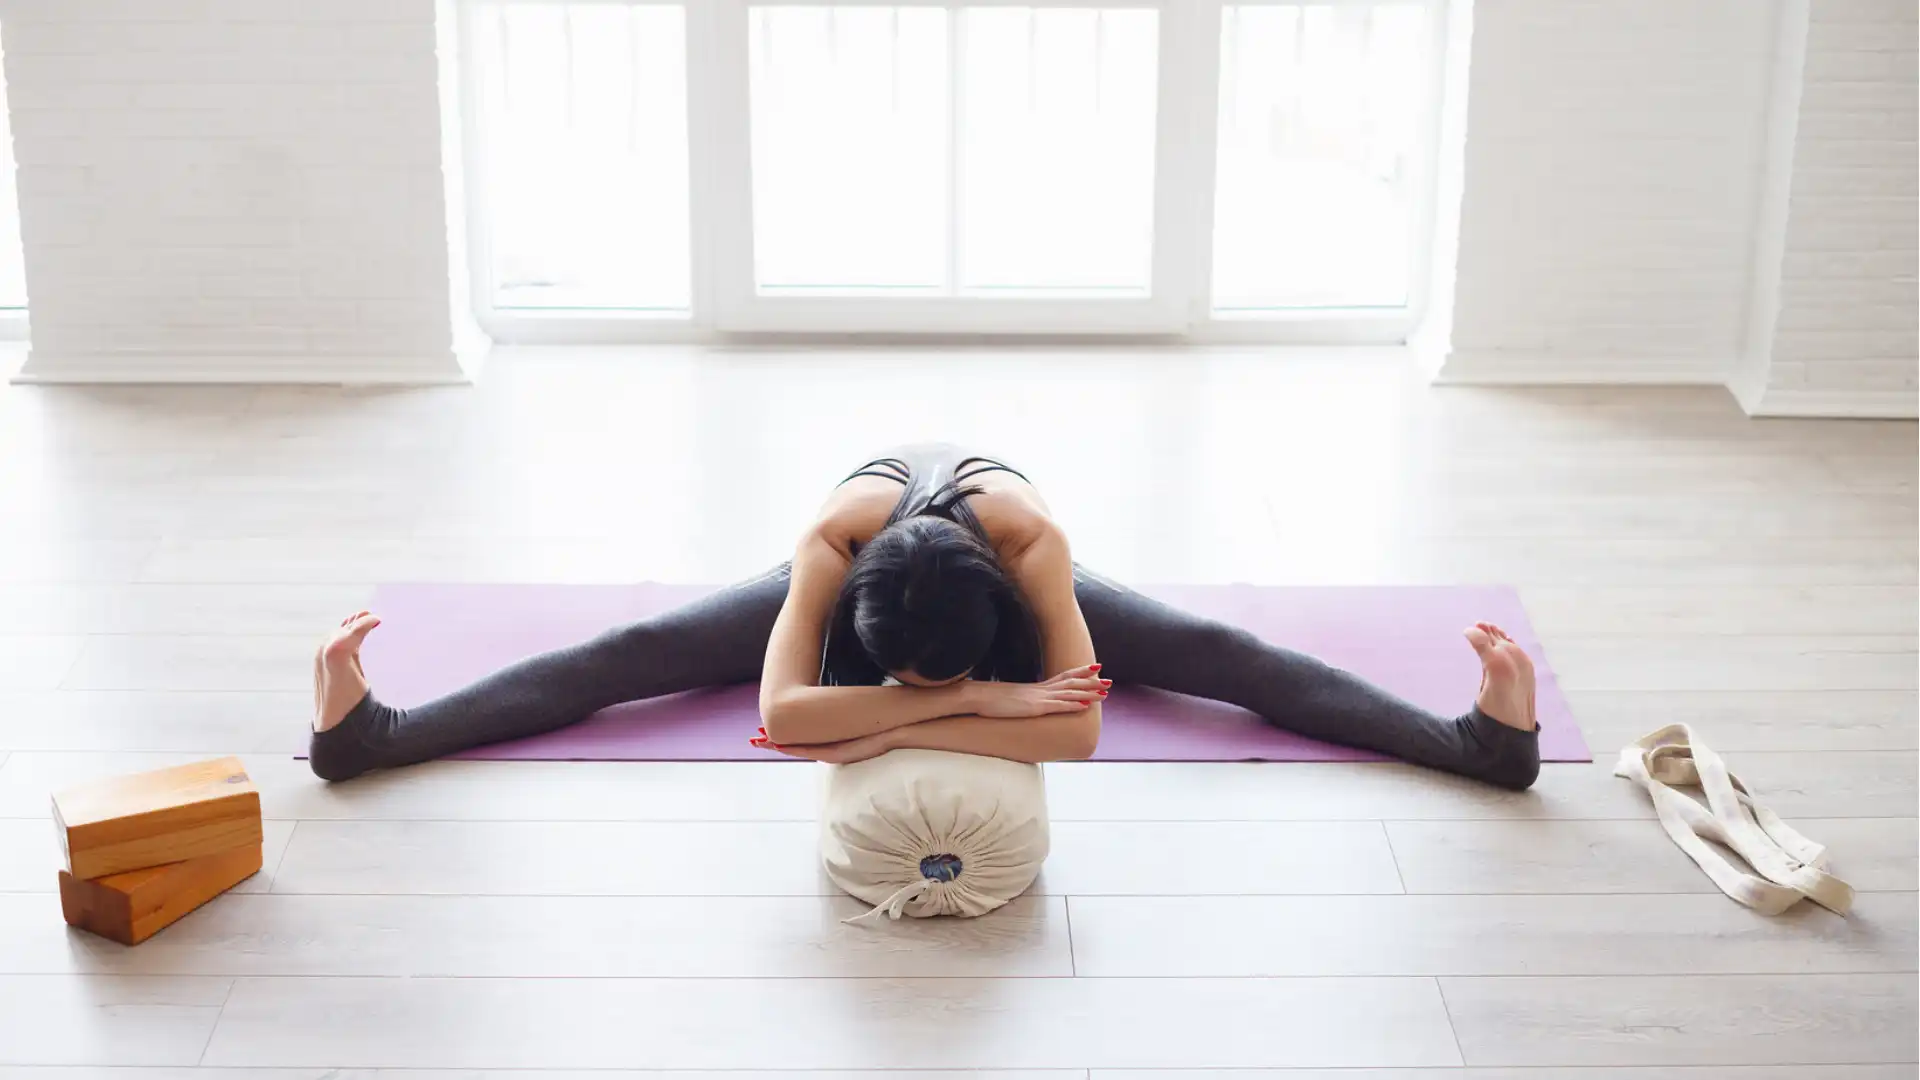
5. Upavista Konasana (Seated Wide-Angle Pose)

Tightness in the hamstrings often prevents yogis from finding a satisfying forward fold with the legs together. However, widening the legs takes the stretch out of the lateral hamstrings and more into the medial hamstrings. Wider legs will also give you more room in the hips to hinge forward. The support of the bolster makes this a soothing, calming, restorative yoga pose.
- To find a Seated Wide-Angle Pose, sit on your yoga mat with your legs stretched out wide and your feet flexed.
- Check your pelvic position. If your pelvic rim is tilting back and your lumbar spine is rounding forward, place a bolster, block or folded blanket under your pelvis to encourage your pelvis—rather than your spine—to initiate the forward bend.
- Place the short end of your bolster against your belly and inner thighs.
- Walk your hands forward, lengthening your torso over the length of the bolster. Be sure to keep your feet flexed and your toes pointed upward while you are in the forward fold.
- If you don’t find the forward fold comfortable, stack an additional bolster or folded blankets to increase the height of the props. You can also place a block (on its side) at the “head” end of your bolster so that your bolster slants upward, away from your pelvis. Then add extra folded blankets to your bolster to raise the height if needed.
6. Viparita Karani (Legs Up the Wall) Chair & Bolster Option
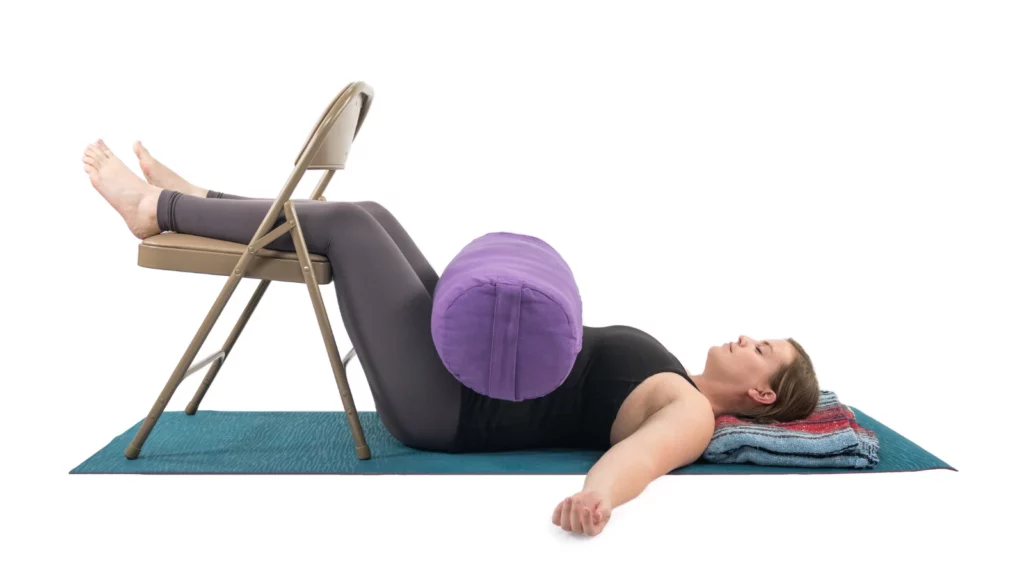
Legs Up the Wall is the ultimate restorative inversion yoga pose and has numerous benefits, including increased circulation, decreased edema of the lower extremities, and easing of lower back tension. Using a chair instead of a wall for your inversion is helpful for yogis with tight hamstrings or for those whose lower back tends to arch up in the pose.
- Place all four feet of a sturdy chair on your mat so that the seat of the chair is most accessible.
- Lie on your back and rest your legs from the backs of your knees to your heels on the seat of the chair.
- Place the long bottom edge of a bolster onto your belly resting on your thighs. The added weight of the bolster will help relax your lower back muscles and improve any aches or discomfort.
 Jennifer Williams-Fields E-RYT 200 is passionate about writing, yoga, traveling, public speaking, and being a fabulous single momma to six super kids. Doing it all at one time, however, is her great struggle. She has been teaching yoga since 2005 and writing since she first picked up a crayon. Although her life is a sort of organized chaos, she loves every minute of the craziness and is grateful for all she’s learned along the way. Her first book “Creating A Joyful Life: The Lessons I Learned From Yoga and My Mom” is now available on Amazon. She has featured her essays on Yahoo! and Dr. Oz The Good Life. She is a regular writer for Elephant Journal Magazine, Your Tango, and YogaUOnline. See more from Jennifer at jenniferwilliamsfields.com

