Looking for ways to take your Downward Facing Dog Pose to the next level? Natasha Rizopoulos shares her 4 top tips and tricks here.
Benefits of Downward Facing Dog Pose
Downward Facing Dog Pose (Adho Mukha Svanasana) is one of the most foundational and widely recognized yoga postures. Teachers may cue this posture repeatedly throughout classes in beginning to advanced yoga practices. And yet, for many students, this pose can be incredibly challenging to hold.
Downward Facing Dog builds strength in the legs, arms, upper back, and core muscles, and it’s common for students to experience fatigue in these regions when holding this posture for more than a few breaths.
But thankfully, as renowned yoga teacher Natasha Rizopoulos explains in this video, a few simple alignment cues can go a very long way in cultivating a version of the posture that students can sustain while minimizing discomfort and pain.
In this short video, Natasha offers her best advice to supercharge your Downward Facing Dog Pose. Through the four simple tips covered in the video and outlined in the text below, Natasha debunks common cues that encourage misalignment in beginning students. Her tips allow students and teachers to gain a better understanding of how to align the legs, pelvis, spine, shoulders, and hands to embrace their strongest, most stable version of Downward Facing Dog.
1. Use a Wall to Supercharge the Legs for Downward Facing Dog Pose
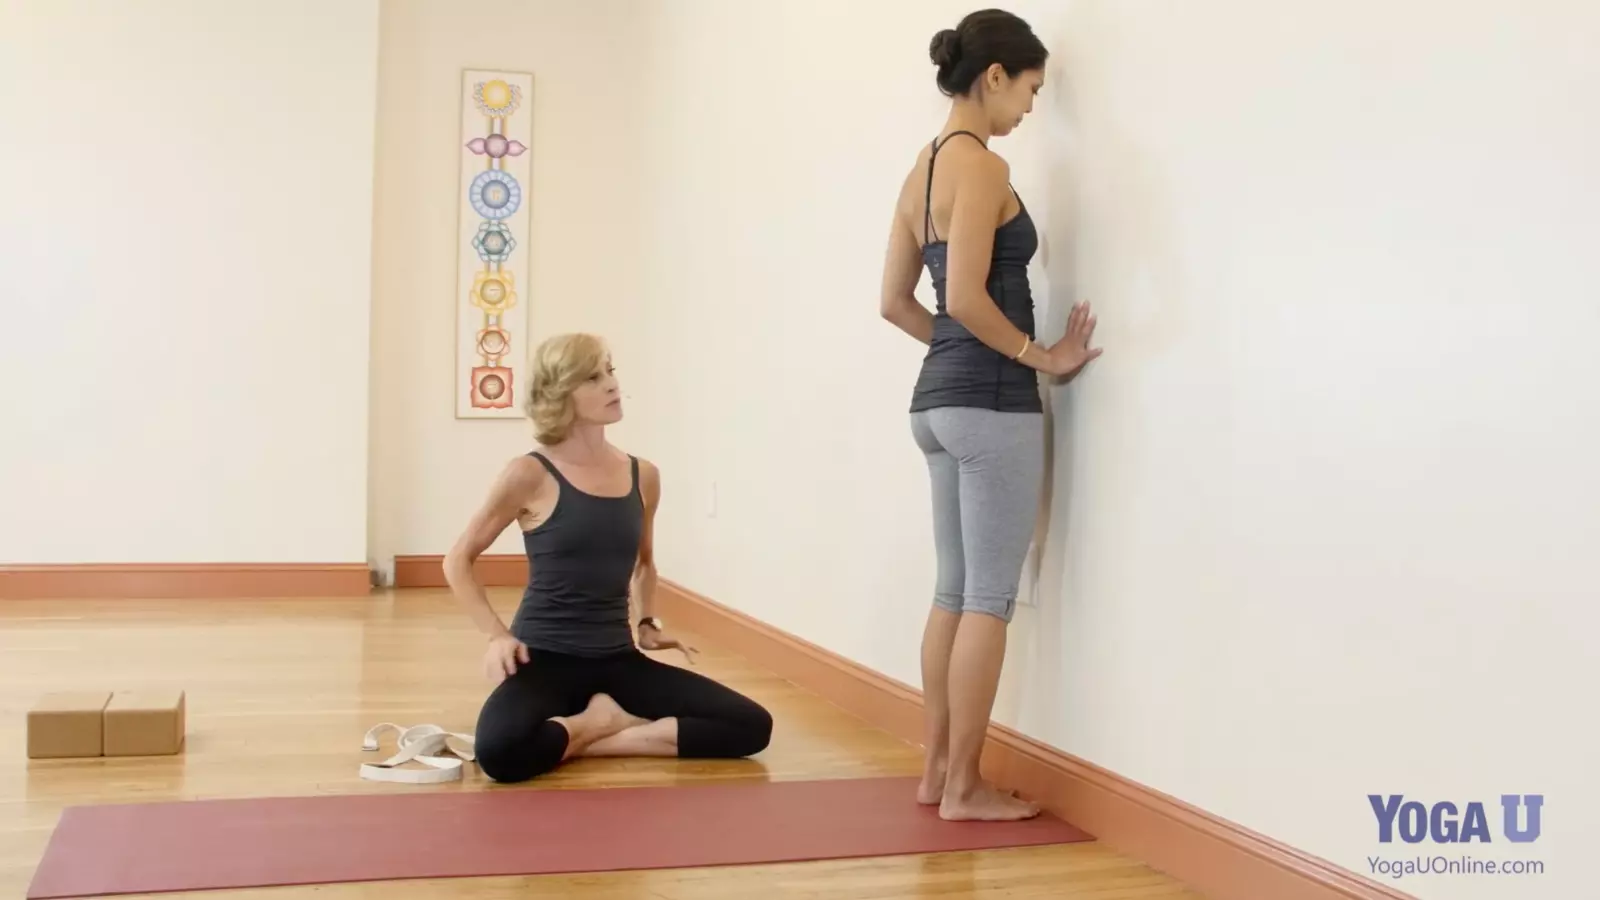
One of the most common mistakes beginners make in Downward Facing Dog is trying to press their heels to the floor. This is a common alignment cue that may need rethinking because it’s not appropriate for all bodies.
Attempting to ground the heels may cause students with tight calves to force their heels to the mat, which can cause strain or pain in their Achilles tendons or ankles. Forcing the heels down can also cause students to jam their knees back, which can cause pain in both the knees and the low back.

A more intelligent action than grounding the heels is to press firmly through the big toe mounds. As Natasha shows us in this video, a wall can be an essential prop in directing students’ awareness of where to anchor in the feet. By finding this point of engagement, the legs awaken into a more intelligent, alert position.
Pressing down through the big toe mound encourages engagement and a slight internal spiral of the inner thighs. This action is especially important in students with short or tight hamstrings, as it keeps the back of the legs active and prevents the hamstrings from being overstretched.
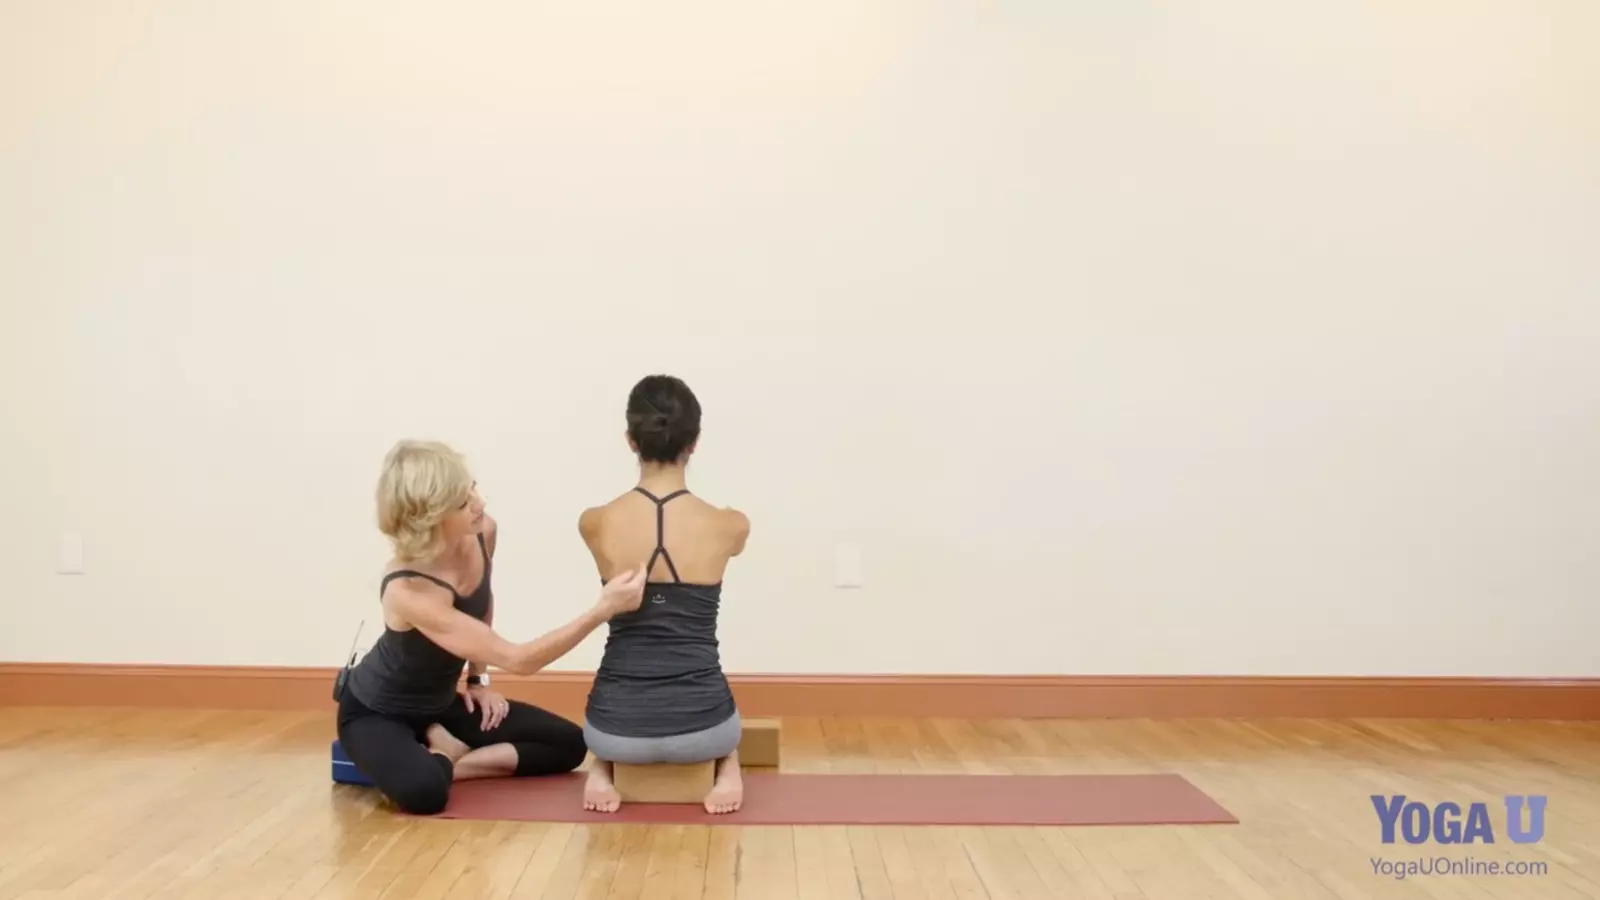
2. Use a Strap to Align the Pelvis for Downward Facing Dog
Another alignment cue used too often by yoga teachers is to “tuck your tailbone under.” Teachers frequently give this cue with the intention of encouraging a neutral spine and pelvis. However, for many students, this causes a posterior tilt of the pelvis and a flattening of the lumbar curve, which is counter-productive and may lead to low back pain.
What’s more, tucking the tailbone under may be students’ default pelvic alignment if their hamstrings are short or tight. This alignment can cause students to round their back in Downward Facing Dog Pose.
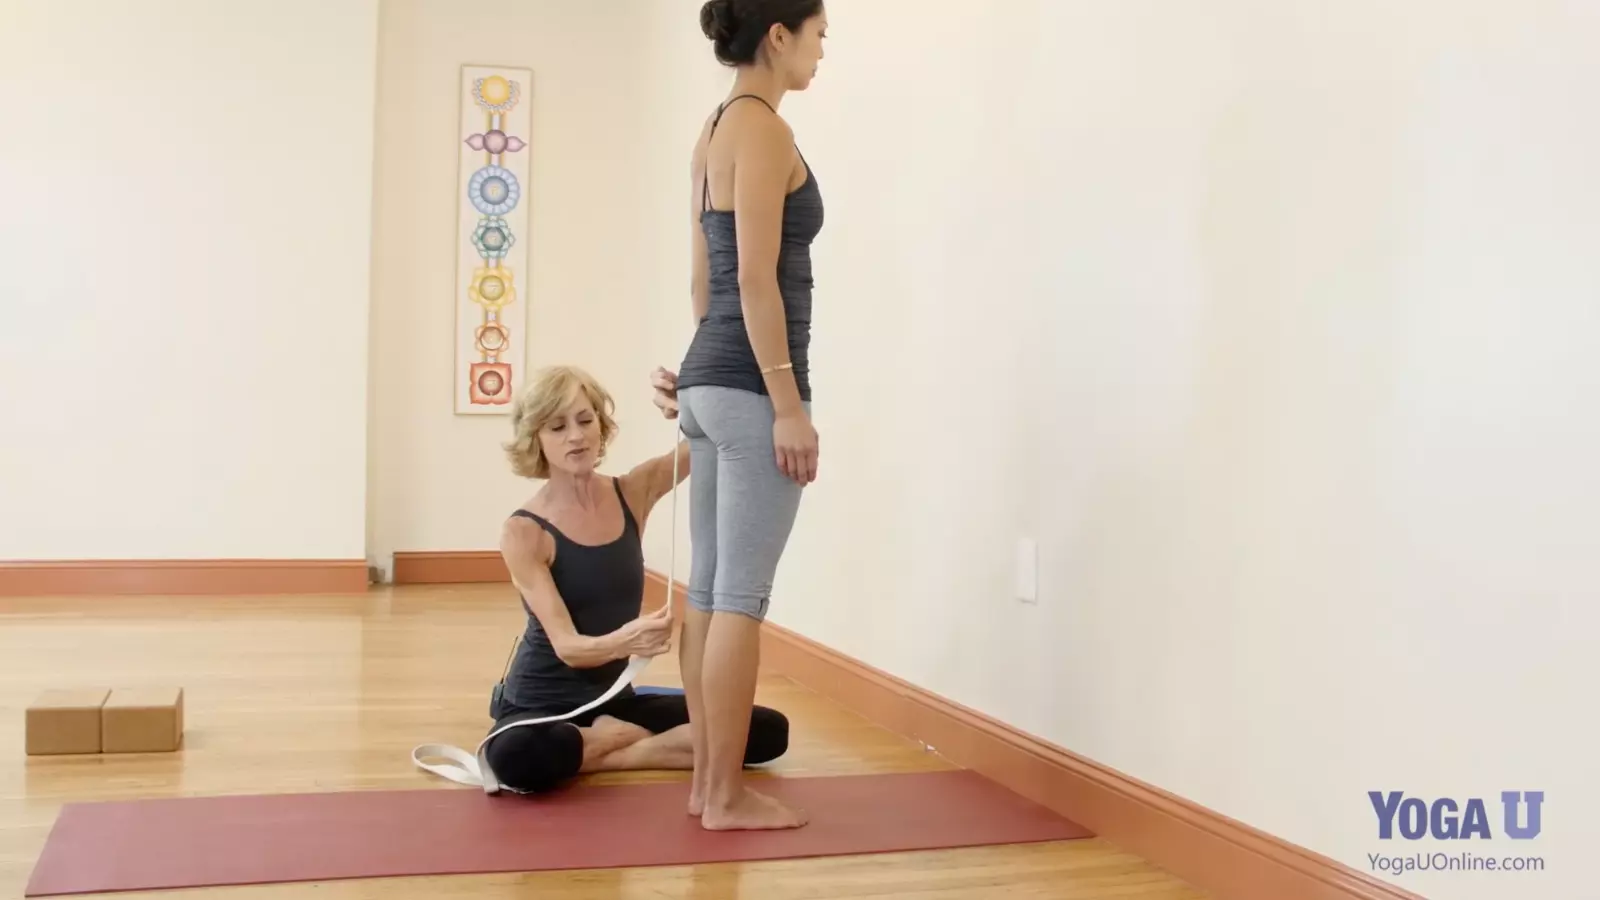 Instead of giving the cue to “tuck your tailbone” liberally, this cue should be provided only to students who have a pronounced anterior tilt in their pelvis, which teachers may spot from an exaggerated concave curve in the lower back. To encourage students to become aware of their own habitual pelvic alignment, Natasha suggests students use a strap in Mountain Pose (Tadasana) to visualize how the pelvis shifts when the pelvis is in a posterior tilt or neutral alignment.
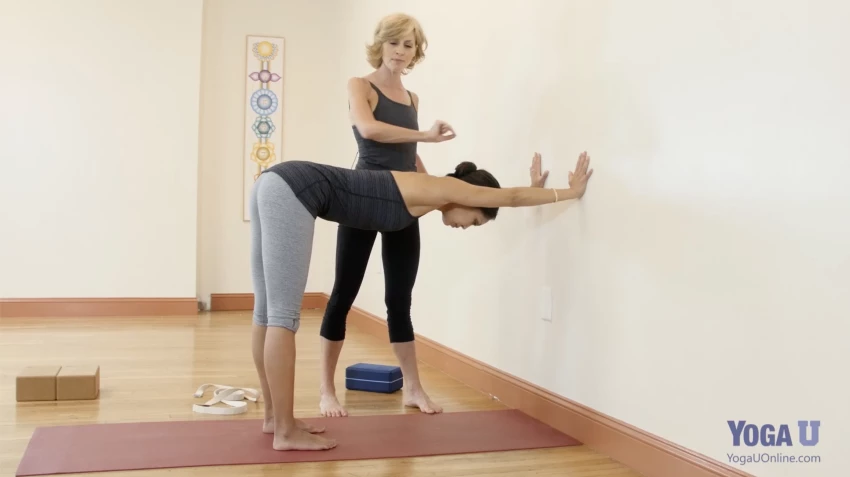
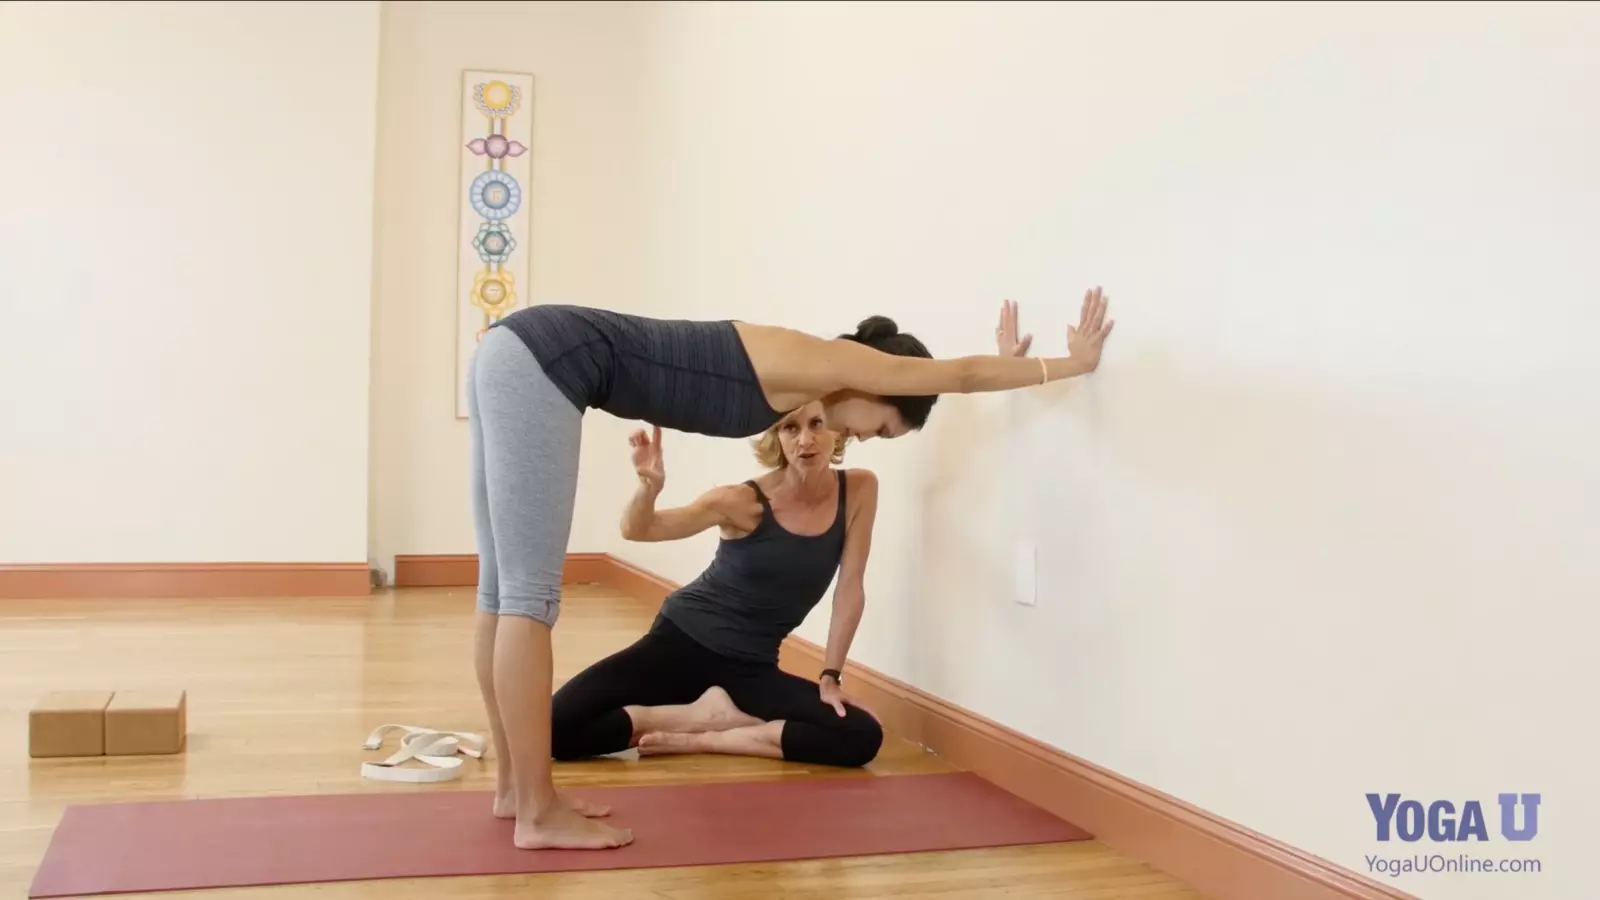
3. Align the Hands and Wrists in Puppy Dog Pose
Pain or discomfort in the wrists is a common complaint among beginning yoga students. This is especially true among students with carpal tunnel syndrome or who spend a great deal of time working at a computer. Strain in the wrists may be exacerbated by dumping weight into the wrists, which is another common misalignment in Downward Facing Dog Pose.
Instead, students should be encouraged to ground through the entire hands, especially through the first two knuckle pads. As Natasha shows us in this video, practicing Puppy Dog Pose (also known as Half Dog) at the wall can allow students to practice aligning the hands and wrists for Downward Facing Dog Pose. This shape can also serve as an alternative to Downward Facing Dog for students with wrist injuries.
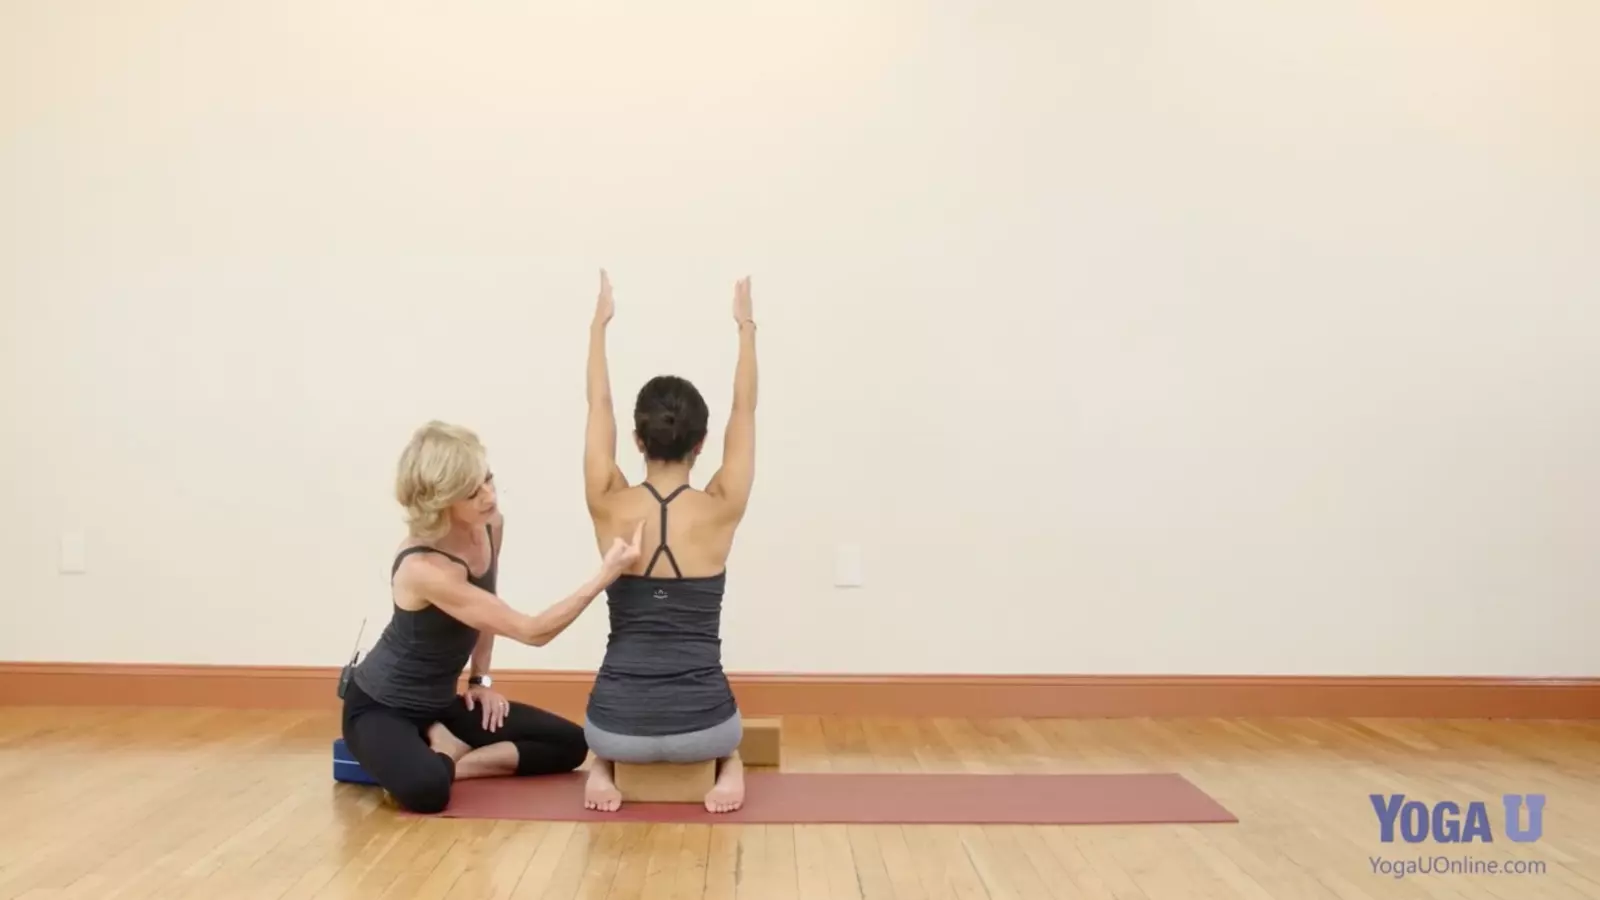
4. DON’T Pull the Shoulder Blades Down in Downward Facing Dog
Cueing shoulder alignment in Downward Facing Dog can be especially challenging for yoga teachers because there is a great deal of individual variability in shoulder anatomy. And yet, shoulder alignment is also critical to understand and cue because the shoulder blades play a critical role in keeping the chest from collapsing in Downward Facing Dog Pose.
Commonly, yoga teachers may cue students to “drop your shoulders” or “pull your shoulder blades down” in Downward Facing Dog. But as Natasha shares in this video, pulling the shoulder blades down the back disrupts the articulation of the shoulder joint and causes congestion in the upper back. Instead, Natasha shows us how to rotate the shoulder blades out and up to find maximum length in the side bodies and relieve congestion in the back and neck.
Natasha’s Practice to Supercharge Your Dog Pose
To refine your alignment and energize your Downward Facing Dog, practice along with Natasha’s video here. For this short practice, you’ll want a yoga strap and wall space. Her guidance is outlined in the steps below:
Supercharge Your Legs
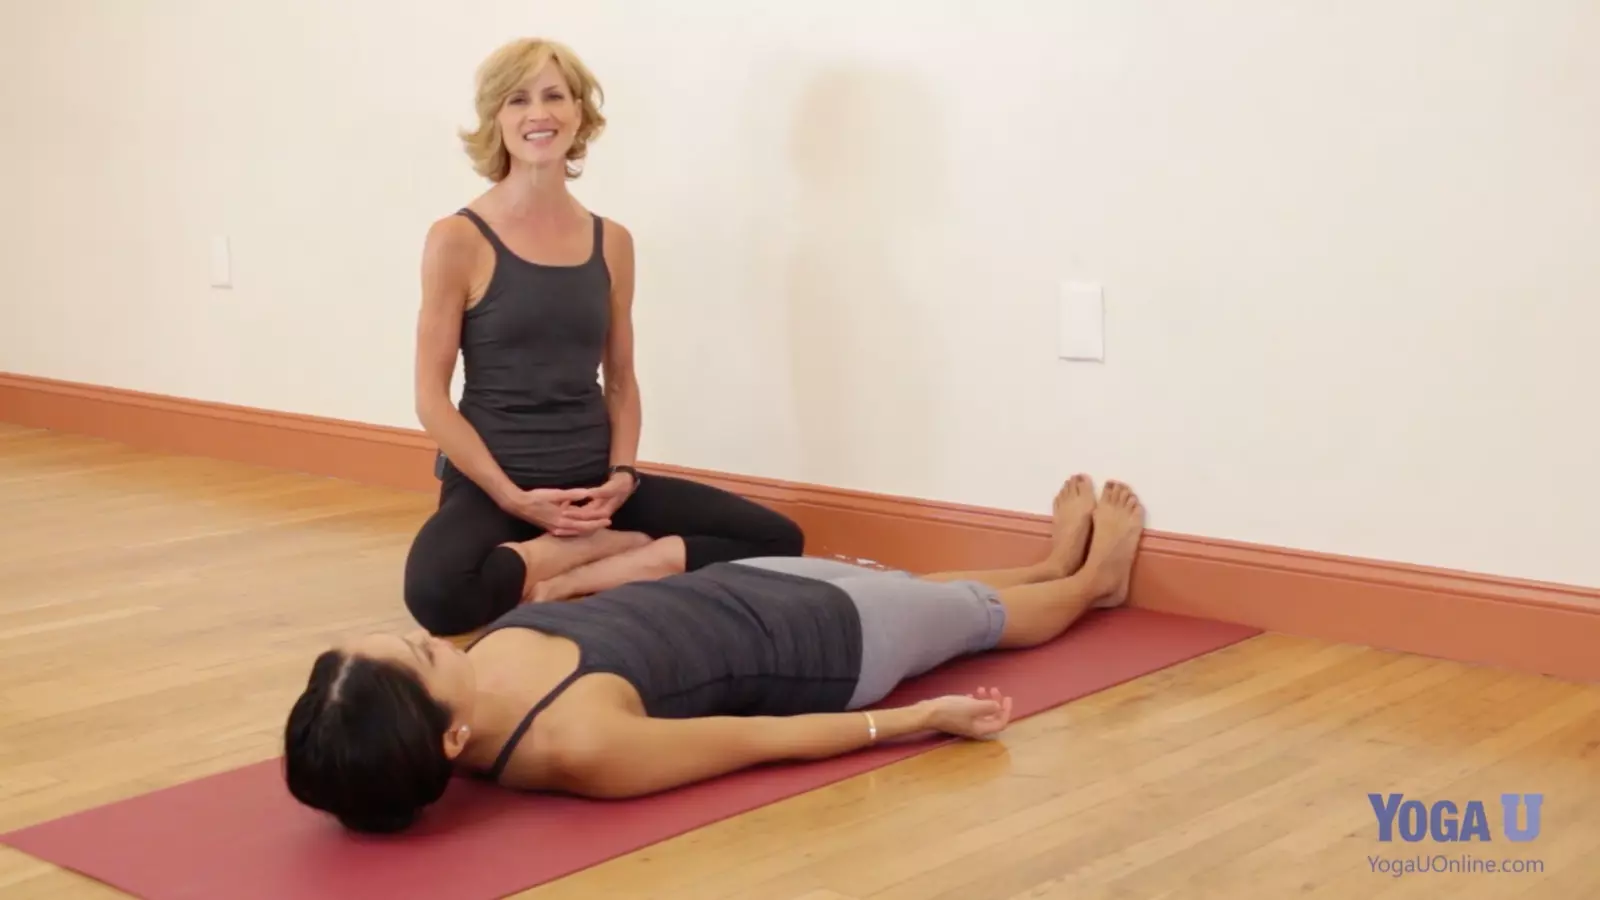
- To lengthen your hamstrings in preparation for Downward Facing Dog Pose, begin lying down on your back with your feet grounded against the baseboard of a wall. Anchor the four corners of each foot into the wall.
- Direct your attention to your big toe mounds and press into this area of the feet with vigor. This has the effect of bringing the legs into a more intelligent and alert neutral position.
- Spin the inner edges of your thighs down toward the floor. Press your big toe mounds into the wall again. You may notice this action allows for greater ease in spiraling the inner thighs in and down especially if your hamstrings are short or tight.
Align Your Spine and Pelvis
- Come into Mountain Pose with a strap. Hold one edge of the strap with one hand at the level of the iliac crest (the top of your “hip bones”). The strap should dangle vertically from the side of your pelvis and the hand with your strap should be placed as if you’re standing with a hand on your hip.
- Picture the strap as a muscle that shortens as you imagine attaching a 10-pound weight to the other end of the strap and let your pelvis shift to accommodate the imaginary weight. Most likely, your pelvis will come into a posterior tilt as the strap pulls down on your sitting bones, and your lower back will flatten.
- Imagine releasing the weight of your strap, letting the imaginary muscle represented by your strap lengthen. Allow your body to shift to accommodate this release in weight. This will likely draw your pelvis back into a neutral orientation and will allow the natural curve of your spine to return.
Align the Hands and Wrists in Puppy Dog Pose
- To prepare for Puppy Dog, stand in Mountain Pose facing a wall, and place your hands at your frontal hip bones.
- Keeping your hands at that height, step back enough so that your arms and torso form a straight line that is parallel to the floor as your hips come to stack over your heels. Your body should now be in a relatively square position with the torso and legs forming a 90-degree angle.
- Notice whether it is challenging to maintain this square position. If you have short or tight hamstrings, you may notice your pelvis coming into a posterior tilt and your lower back rounding, similar to the feeling of placing the imaginary weights on the strap in the previous exercise.
- Explore the feeling of Downward Facing Dog Pose in Puppy Dog by keeping the feet parallel and hips-distance apart and by keeping the hands at shoulders-distance apart with the wrist creases parallel to each other. Ensure the wrists are in a straight line rather than tilting toward or away from one another.
- With the hands and wrists properly positioned, root into every knuckle pad and every fingertip, using the strength of your arms to push your hips back and opening the armpit 180 degrees. This action will create a straight line from the palms to the sitting bones.
Aligning Your Shoulders
- Stand in Mountain Pose.
- On an inhalation, take your arms straight out in front of you and pause at shoulder height. Notice how until the arms reach this height, the shoulder blades don’t move much.
- On your next inhalation, take your arms straight up overhead, taking your fingertips toward the ceiling. Notice the movement of the inner border of the shoulder blades as you do. You’ll find the shoulder blades must rotate away from the spine out and up toward the outer armpit.
- Notice what happens when you pull the shoulder blades down the back as you take your arms overhead. You may observe this action disrupts the articulation of the shoulder joint and creates congestion in the upper back.
- Next, rotate the shoulder blades out and up to find the maximum length in the side body. As you do, you may notice there’s no congestion in the back of the neck. This is the alignment you’ll want to replicate in Downward Facing Dog Pose.

 Natasha Rizopoulos~As a dedicated Ashtanga practitioner for many years, Natasha is equally captivated by the precision of the Iyengar system. These two traditions inform her teaching, creating a mindful and dynamic blend of Vinyasa Flow. Now a Senior Teacher with Down Under Yoga, and a writer, teacher, and DVD instructor for Yoga Journal, Natasha is known worldwide for her ability to communicate the essence of sophisticated postures and ideas in ways that have a transformative effect upon one’s understanding of Yoga. Over the past twenty years, she has refined a method of teaching that empowers students to make profound connections between the alignment of the body and the mind, the physical and the spiritual. This perspective on Yoga and Asana is Align Your Flow.™